To simplify the process of designing and producing interior design, Thudio has prepared Modular 3D that can be used in Sketch-up. Here is a Tutorial and a basic explanation of how to use Modular 3D by Thudio
A. What is Modular 3D
Modular 3D is a customizable 3D that you can stretch to the size and specification you desire with some clicks.

notes:
You are prohibited to explode the 3D modular. Exploding causes errors and breaks the 3D.
B. How to Use Modular 3D
1. Put Item into Your Design

- Open Thudio Tab, and login with your account
- Go to 3D Catalogue and click tab "Modular"
- Choose "Kitchen"
- After opening the section, you can see categories like "Base Unit", "Top Unit", etc. You click to see each category or you can scroll to see all the item
- If you found what you need, click and drag to Sketchup to use.
2. Change Configuration from Inspector
I. Edit with Inspector

A. Dimension
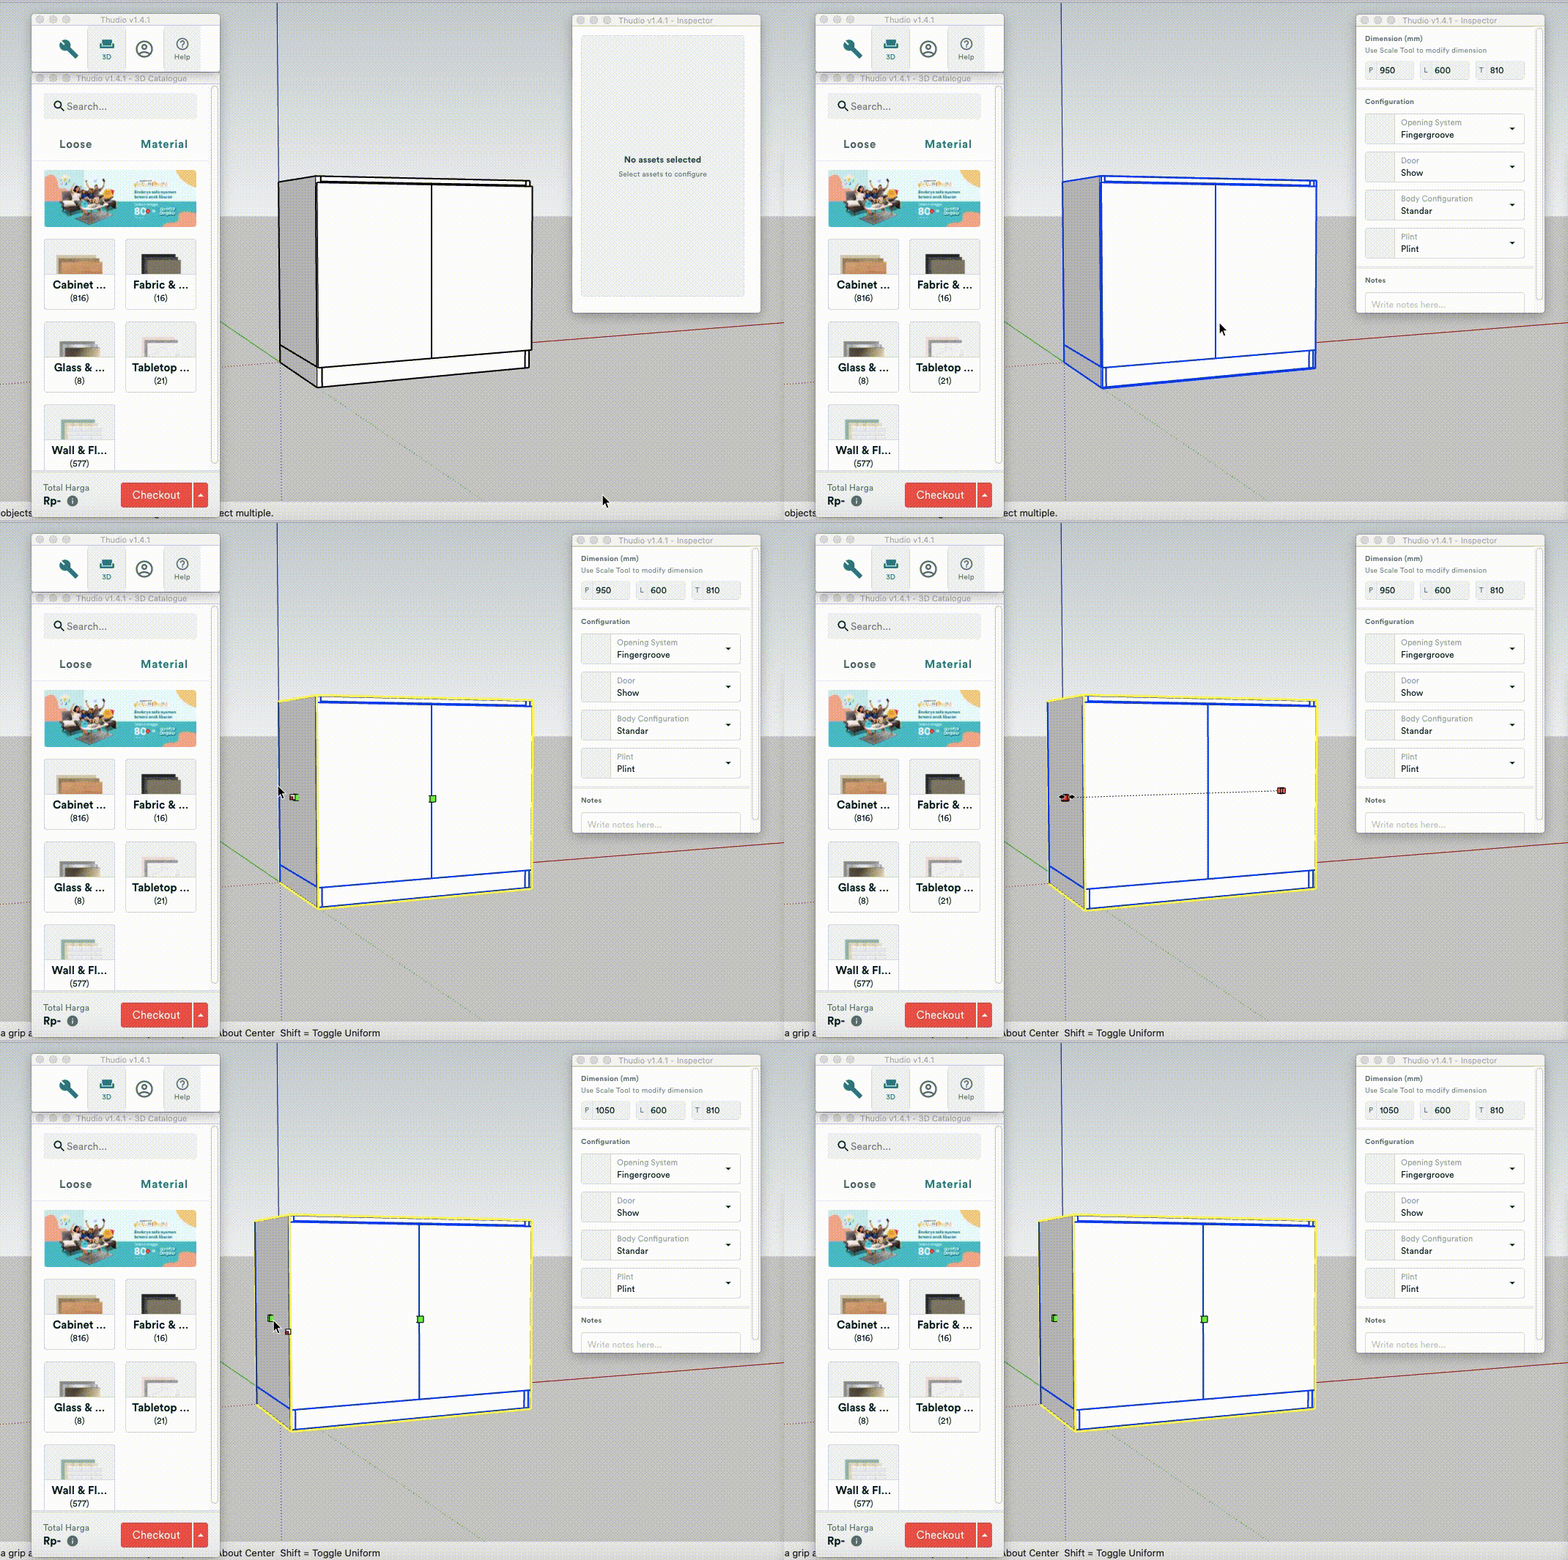
The dimension section only shows the dimension not for changing the size. You can use scale to change it
B. Configuration
You can customize it by choosing options by the dropdown button or filling by number.
II. List Options
First, you need to open the "Inspector" or ![]() icon by clicking it and then click the item you want to change, and options will appear in the inspector.
icon by clicking it and then click the item you want to change, and options will appear in the inspector.
Each cabinet unit may have different options depending on the cabinet type. Here is the option you can access:
A. Opening System

Opening System:
1. Finger groove: For instant finger grooved cabinet
2. Handle: Plain door, then you can pick handle from thudio library
For the handle collection go to Loose > Hardware & accessories > Accessories
B. Show Hide Door

Show Hide Door:
1. Show: The door will be shown
2. Hide: Door will disappear from the cabinet. you can use this to insert accessories and shelves. This is also a presentation tool to show the client the inside of the cabinet
C. Body Configuration

Body Configuration:
1. Standard: Full top panel of the cabinet
2. Sink/Hob: Hole at the top of the cabinet suitable for sink or hob installation
D. Plinth/ No Plinth

Plinth/ No Plinth:
1. Plinth: For an instant 8cm plinth choose this option
2. No Plinth: For custom, chooses no plinth and make your own plinth. you can also use this for the LPG cabinet
*ps. Always feel free to combine the manual 3D workflow with this.
E. Drawer Amount

Drawer Amount: Adjust how many drawers you want in your cabinet. You can choose between 1-5 drawers.
F. Cabinet Depth for Corner Cabinet

Cabinet Depth: Only for corner cabinets, you need two steps to adjust the size:
- Stretch the overall cabinet
- Fill in the cabinet depth you desired
G. Fill in the Size
Fill in :
1. Shelf Height: To adjust the height of the fridge shelf
2. Dispenser Cut Out Lenght & Height: To adjust the access hole to the dispenser
H. Shelf Quantity

Shelf Quantity: Adjust how many shelves you want for your open shelf cabinet by filling in the number you desired
3. Change Item Size with Scale Feature
There are 2 ways to change item size that will be :
A. Option 1 - stretch only
- Click on the cabinet you want to scale
- Click the "scale" option or use the "s" shortcut on the keyboard.
- Then, click on the axis you want to change, navigate "scale" Move the cursor along the axis to change, and then left-click to end stretching.
B. Option 2 - Stretch Input Exact Amount + unit (cm/mm)

- Click on the cabinet
- Click the "scale" option or use the "s" shortcut on the keyboard.
- Then, click on the axis you want to change, navigate "scale" Move the cursor along the axis, and don't click.
- When still in scaling behavior, fill in the exact number with the unit of measure (mm, cm, or m) for a specific range. Then click enter.
4. Apply Finishing

- Click on the tab "Material"
- Then click "Cabinet Finish"
- After looking at Thudio's various material options, click the material you desired.
- Apply to the modular cabinet
*ps. The material is already set with the common direction you don't need to change it manually
5. Combine with manual workflow
This modular here is not to replace all your existing workflow, you can always combine the modular with manual making 3D too like customizing plinth height and also making the countertop of the kitchen set

